A Word document with page numbers starting on page 3 is easy to set up, even if the numbering should start with 1 instead of 3.
Page number from page 3: Step 1 – Structure sections
In order to insert page numbers in Microsoft Word starting from page 3, you must first divide your document into sections.
- Click to the very end of the text on the second page. This is usually the table of contents.
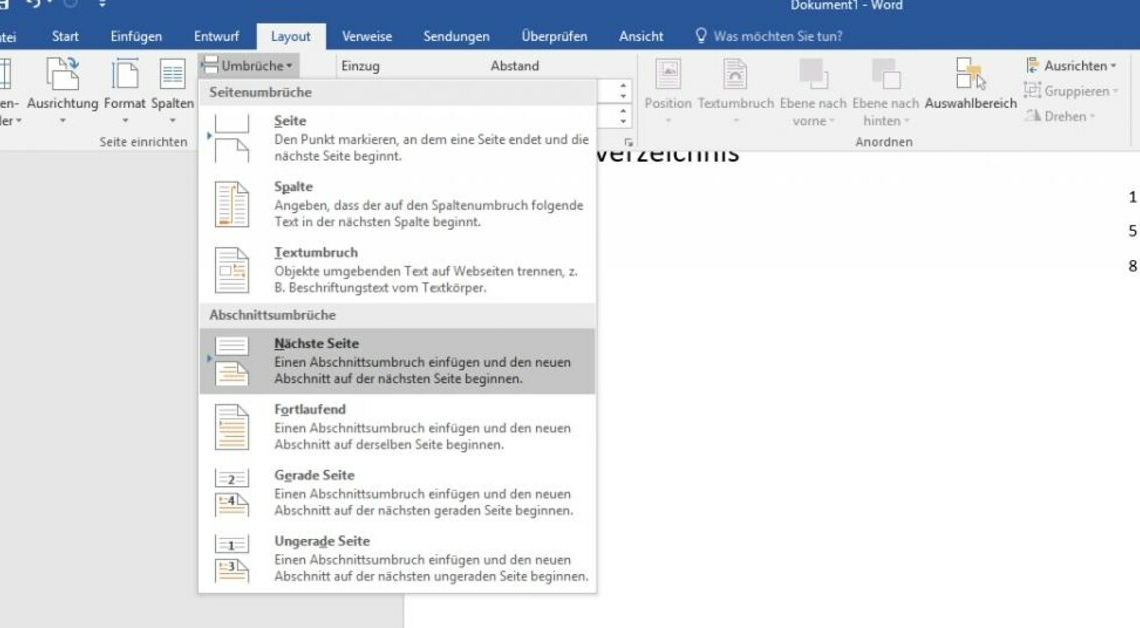
- Select the Layout tab from the menu and click Breaks and then Next Page. Danger: The page break does not work during footnote editing, but must be done beforehand.
- You may now need to bring the text back up on the next page by deleting the manually inserted paragraphs. Tipp: Under “Start” you can display all paragraphs and breaks by clicking on the paragraph symbol.
- Now double-click in the footer area on page 3 and deactivate the option “Link to previous” in the “Navigation” menu. You will find the menu in the middle, slightly to the top right of the menu bar.
Step 2: Insert page numbers
Of course, in order for the page numbers to be displayed, you have to set them up. This is how it works:
- Click again in the footer on page 3 and select “Page number” from the menu. Here you can decide on a position and design for your page numbers.
- Word will now insert page number 3 by default. If you want to start on page 1, follow the steps below.
- Under Page Numbering, click Format Page Numbering.
- Under “Page numbering” select “Start at” and then enter the number 1 in the text field. Confirm with “OK”.
- Now, in the “Page number” drop-down menu, select where you want the numbering to appear as usual.
- Now your Word document will start numbering the pages consecutively from the third page onwards, starting with page number 1.


Compare more offers
Also interesting:
- Word: Turn off autocorrect
- Inserting a comment in Microsoft Word – here's how
- Word: set dark mode, turn off dark mode