Flyers are handy, informative and easy to produce: you can even create flyers in Word without having to rely on special layout software. This tip will show you exactly how to do this.
1. Determine flyer size
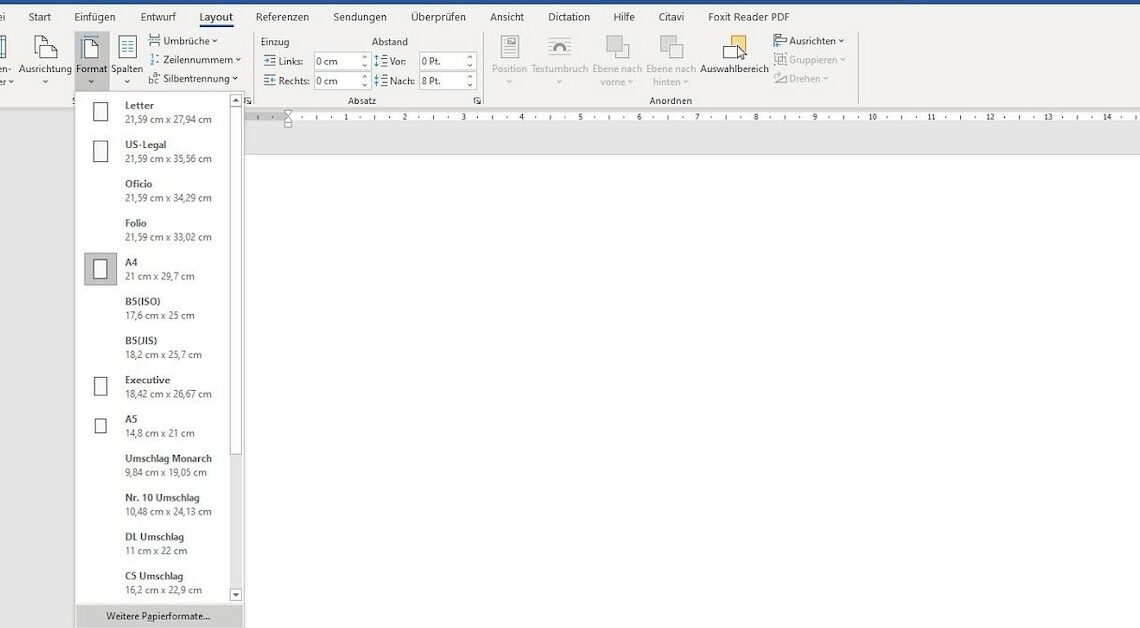
- Open a new document in Word and click “Page Layout” in the menu.
- There you will also find the item “Size”, which already contains a small selection of the most popular formats.
- However, you must select “Other paper sizes” because you cannot use a standard format for flyer printing.
- The dimensions for an A6 flyer are 10.5 x 14.8. However, the printer usually requires a bleed. This enables borderless printing, among other things. This bleed is approximately 3 additional millimeters. You can find out more from your printer.
- The bleed must be added on all sides to give the new dimensions of 11.1 x 15.4. You must enter these in the width and height and confirm with “OK”.
2. Design and export
- Once you have set the correct flyer size, you can design the flyer however you like.
- All color elements and shapes should extend to the edge. The text, however, should be at least one centimeter away from each edge. This way, none of the text is cut off.
- Once your flyer is ready, you just need to save it as a PDF. This format is standard for all printing companies. To do this, simply click on “Save as” and select “PDF or XPS”. When saving, you may need to select PDF. However, this is usually the default setting.
Video tip: Create flyers – this software makes it work
A freeware layout program is “Scribus”, with which you can create professional flyers and other printed products. You can find the free download link here.