
With a tick in Word, you can draw attention to a specific point. Inserting the symbol into a document is quick and easy.
Inserting a check mark in Word – this is how you do it
If you want to use special characters in Word, such as the check mark, you usually won't find them on the keyboard. But that's not a problem, because Microsoft offers you a number of special characters in Word and the other Office programs, such as Excel.
- To access special characters in Word, first go to the Insert tab.
- In the menu bar, go to the far right, to the “Symbol” area. There, click on the “Symbol” icon.
- The check mark icon is usually not immediately visible, so select the “More Symbols” option.
- In the symbol menu, select the option “Wingdings 2” under “Font”. You will find the check mark in the third row of the displayed symbol table. Double-click to place the check mark in your Word document. Alternatively, click the “Insert” button.
- If you want to set a check mark again, the symbol will now be displayed first as soon as you click on the “Symbol” icon. Alternatively, you can copy the check mark that has already been set and then paste it in the desired places.
- Tip 1: You can also place check marks in your Word document by typing either the capitalized letter “P” or “R”. After you have highlighted the letter, change the font to “Wingdings 2”.
- Tip 2: In addition to the simple check mark, you will find another practical icon in the symbol menu: a pre-made box with a check mark. The icon can be used for items on a to-do list that have already been completed.
Trick: Save check marks in Word permanently and insert them faster
If you need the check mark regularly in Word documents, there is a little trick that will save you a lot of time.
- Think about which keyboard character you never use and which you can easily reach. This could be the hash (#), for example. An unusual combination of letters is also an option.
- After you have chosen a character or letter combination, click on the “File” tab. In the left navigation area, select the last item “Options”.
- Then call up the “Document Checker”. In the menu, click the “AutoCorrect Options” button. Insert the character you have selected under “Replace” and check the box under “With”.
- Important: Don't forget to click the “Add” button and then the “OK” button, otherwise your change will not take effect. If you want to add a check mark in Word in the future, tap the character you have selected.
Latest Videos
Step 1: Save checkmarks in Word
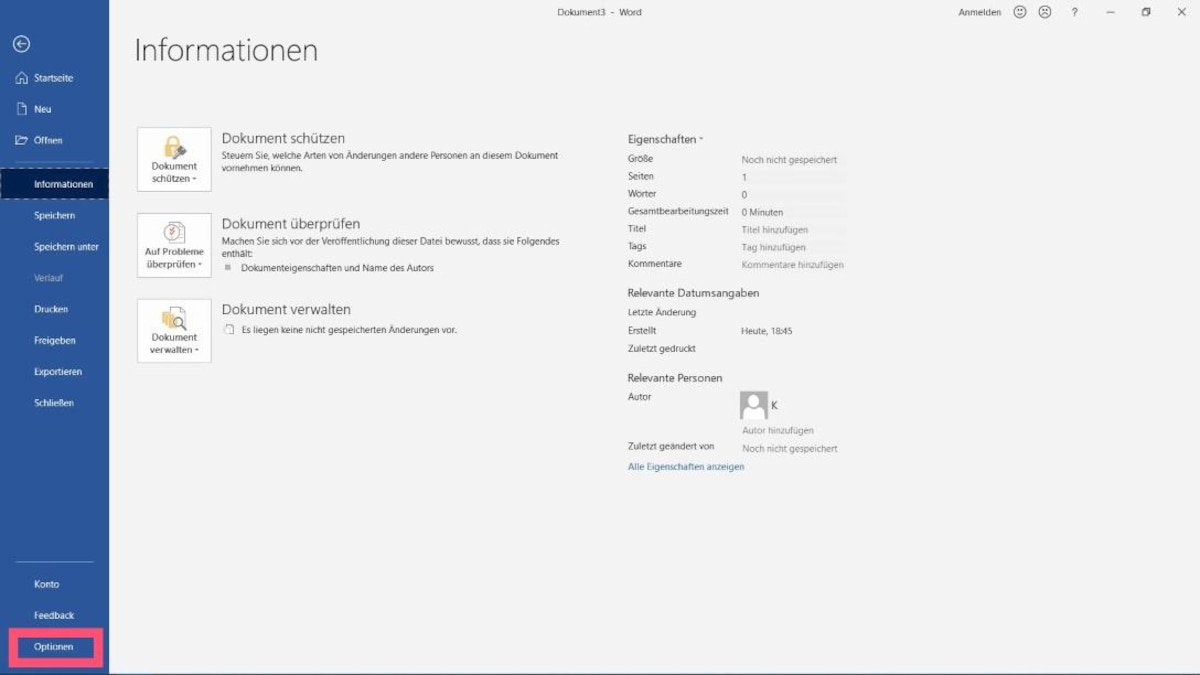
Step 1: Save checkmarks in Word
Step 2: Open the AutoCorrect options
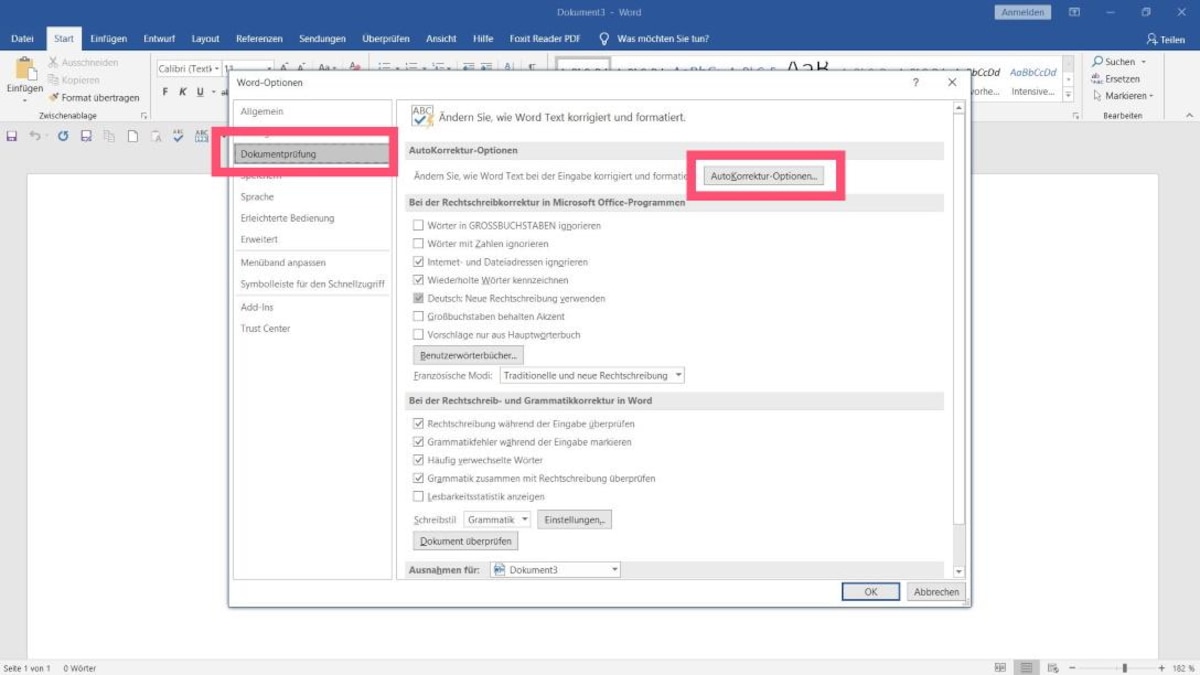
Step 2: Open the AutoCorrect options
Step 3: Replace a letter or character with the check mark
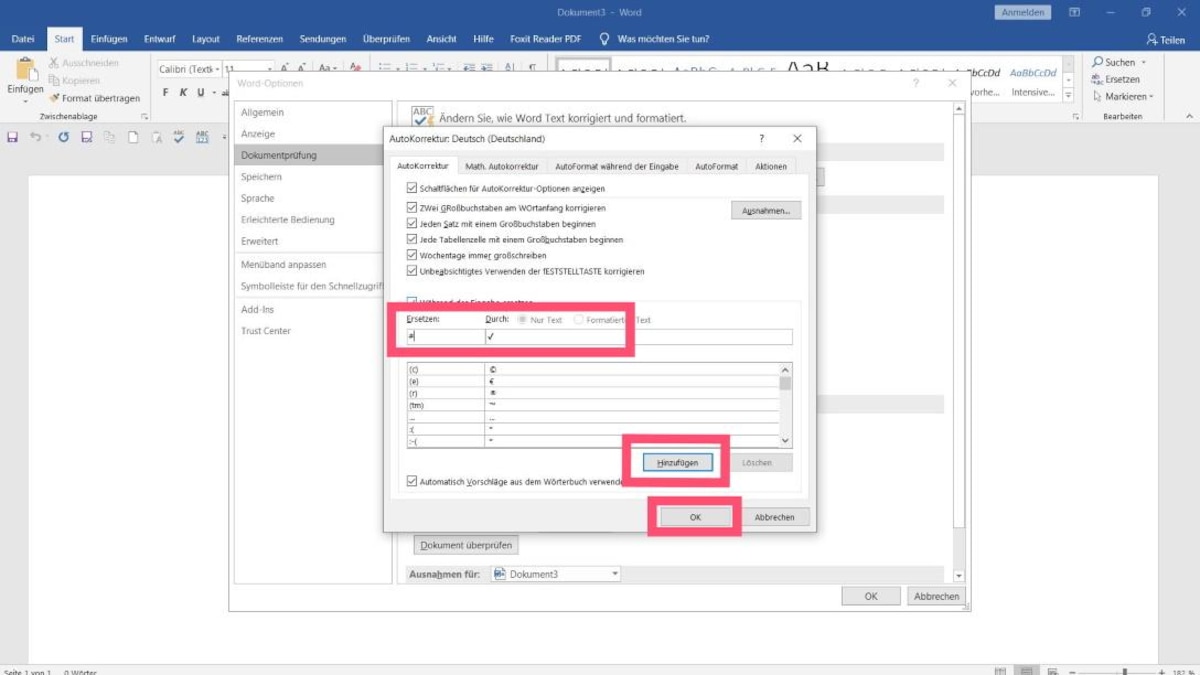
Step 3: Replace a letter or character with the check mark
You might also be interested in:
- Adjust default settings in Word
- Creating a Word outline – how it works
- Word: Activate and use correction mode
- MS-Office Word: Find and replace words