If Word's autocorrect is annoying, you can safely turn it off. You can also quickly set the autocorrect options in your version of Word.
Step 1: Open AutoCorrect options
In the word processing system Word, individual words are occasionally corrected incorrectly. So you always have to check yourself, at the latest after finishing a text, whether Word has made unwanted spelling changes. But all versions of Word offer simple solutions to this problem with the auto-correction options.
- Word 2021: After opening Word, click on the “File” tab at the top left and then click on “Options” in the menu at the bottom left. In the new window, select “Proofing” and then click on the “AutoCorrect Options” button.
- Word 2016: After opening Word, click on “File” in the top left and select “Options” from the menu. From there, go to “Proofing” and click on “AutoCorrect Options”.
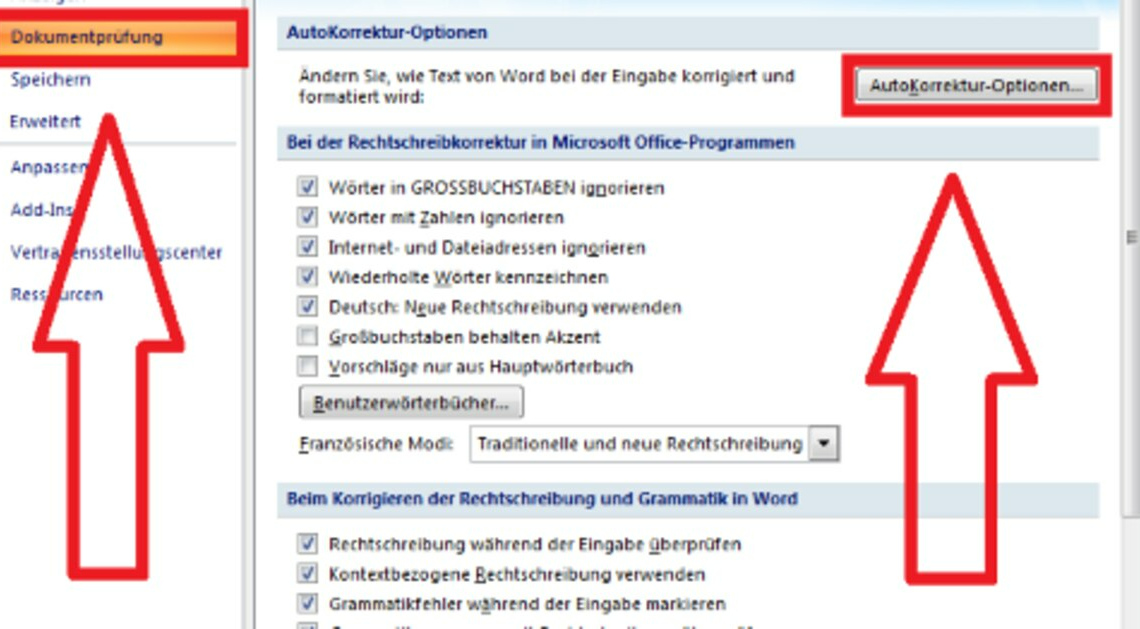
- Word 2013: Click on the “File” tab at the top and select “Options” at the bottom left. Under the “Document Proofing” item you will now find the “AutoCorrect Options”.
- Word 2010: Click on the “File” tab at the top and select “Word Options”. Under the “Proofing” item you will now find the “AutoCorrect Options”.
- Word 2007: Click on the Office button at the top left of the screen and select “Word Options” at the bottom right. On the left in the menu you will now find “Proofing” under which you will see the “AutoCorrect Options”.
- Word 2003: Click the “Tools” button in the top menu and select “AutoCorrect Options”.
Step 2: Disable Word AutoCorrect
After opening the autocorrect options, you still need to turn off the unwanted automatic corrections.
- Under the “AutoCorrect” tab you will now find numerous functions that you can deactivate in automatic correction.
- If you don't want to use autocorrect at all, you can remove all the checkboxes. If you only find individual functions annoying, such as capitalizing words at the beginning of sentences or converting punctuation marks into smileys, just remove individual checkboxes.
- Then apply your settings by clicking on the “OK” button.