
With OpenOffice you can change the line spacing in your documents. The function is not that easy to find.
Line spacing in OpenOffice: quick access via toolbar
OpenOffice has similar features to Microsoft Word, but sometimes you have to do some digging to customize your document. You can apply the line spacing settings to the toolbar. This will give you quicker access to it in the future.
- To do this, click on the small arrow symbol in the toolbar.
- Here select “Visible Buttons” and then the three options “Single Line”, “1.5 Line” and “Double Line” for the line spacing.
- After that, the tools will appear in the toolbar and you can access them directly.
Latest videos
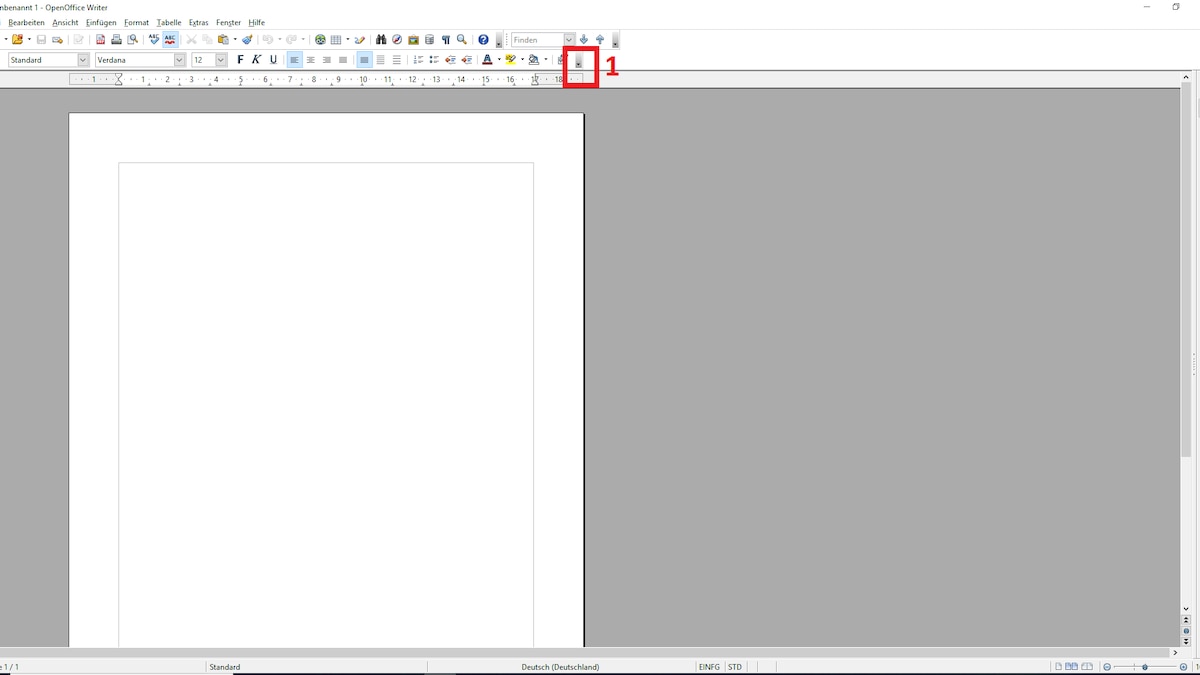
If you want to find line spacing more quickly in OpenOffice, you can add the options using the arrow symbol.
If you want to find line spacing more quickly in OpenOffice, you can add the options using the arrow symbol.
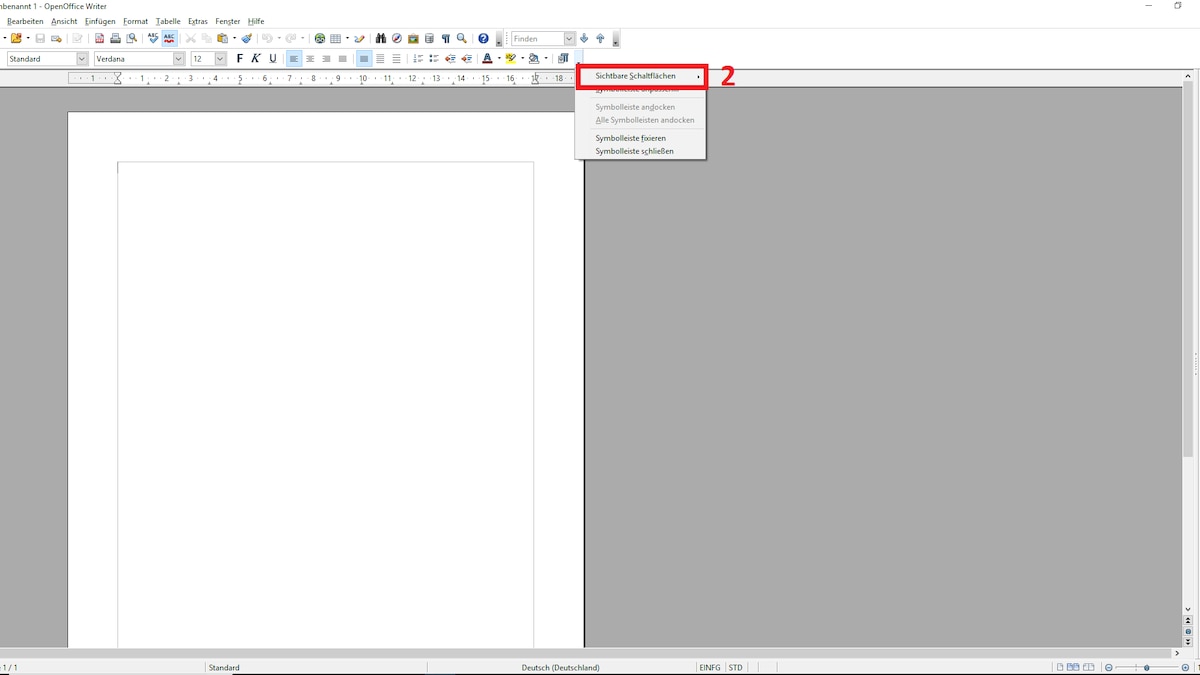
Select “Visible Buttons”
Select “Visible Buttons”
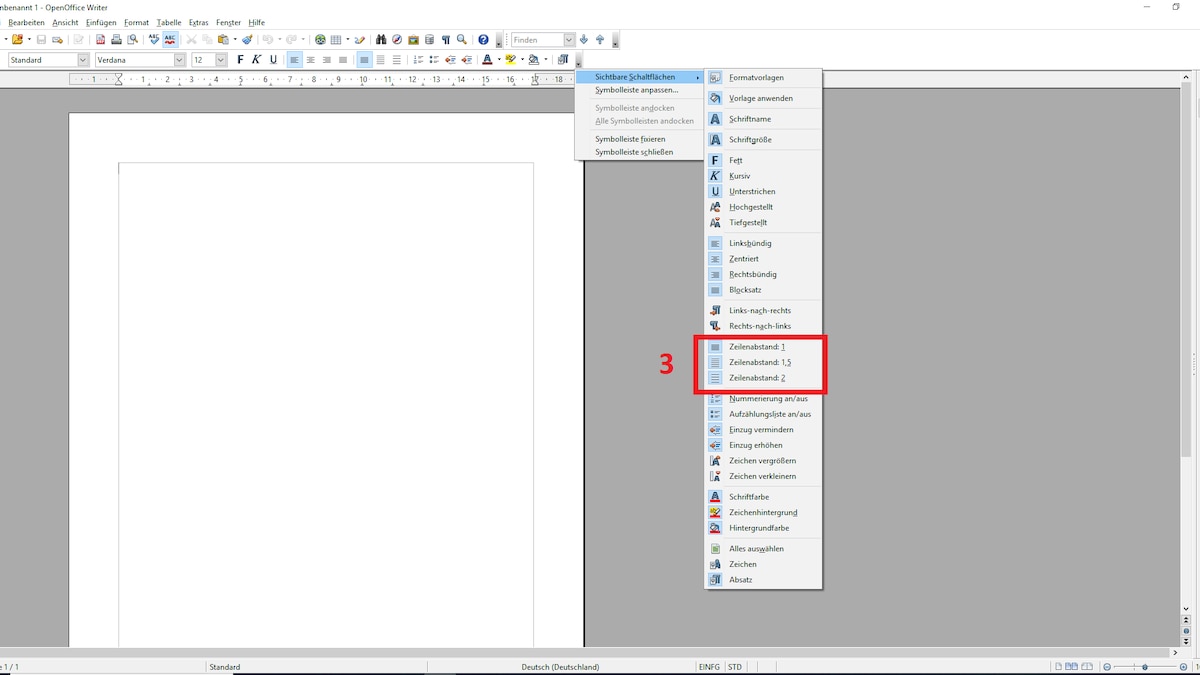
Here you can select the line spacing directly
Here you can select the line spacing directly
Change line spacing in OpenOffice – this is how it works
If you want to set the line spacing for your document, proceed as follows:
- Click “Format” in the menu at the top.
- Click on the third option “Paragraph”.
- A dialog window opens. The “Indents and Paragraphs” tab opens here by default. If not, you need to select this tab.
- There you will find the “Line spacing” option at the bottom, which you can set here.
Latest videos
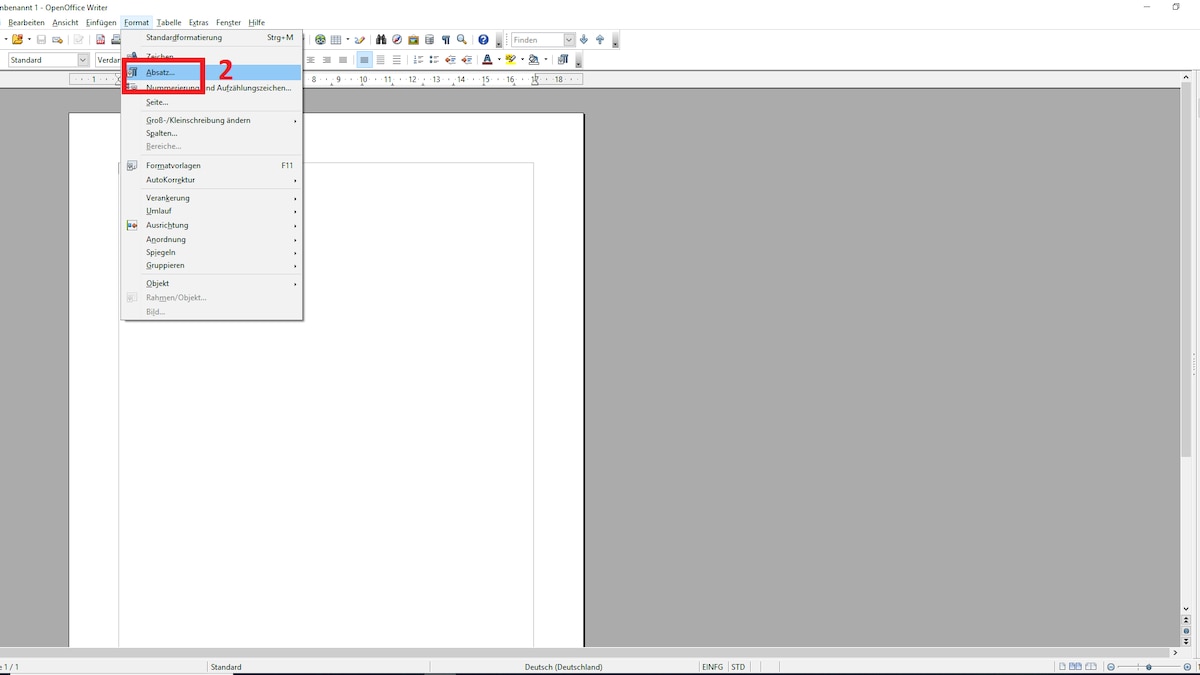
To change line spacing in OpenOffice, first select “Format” from the menu.

To change line spacing in OpenOffice, first select “Format” from the menu.
Here go to the “Paragraph” item.
Here go to the “Paragraph” item.
Under the “Line spacing” option, set the desired value.
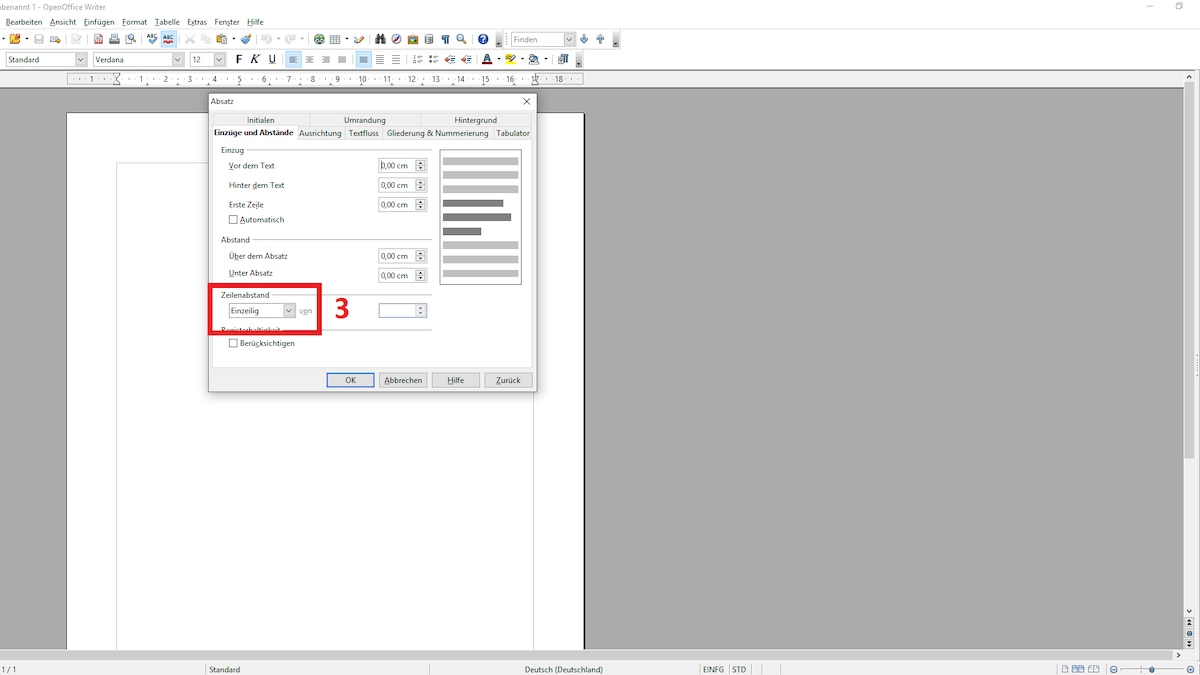
Under the “Line spacing” option, set the desired value.
OpenOffice line spacing options
When it comes to line spacing, you have various options that you can set in addition to “Single Line”, “1.5 Line” and “Double Line”.
- “Proportional” lets you enter line spacing proportional to the font size – from 50% to 200%. 150% corresponds to 1.5 times and 200% corresponds to twice the line spacing.
- “At least” adds the specified distance in cm above your line.
- “Blend” adds the specified distance in cm below your line.
- The Fixed option allows you to specify your spacing in cm instead of proportional to the font size. The font is placed in the lower third of the line spacing.