You must activate Geforce graphics cards if you use another onboard GPU. It is usually enough if you assign them to an application.
Enable GeForce graphics card: Assign GPU to an application
First check whether your GeForce graphics card is in the BIOS active is. You can then assign your graphics card to an application.
- To do this, open the Nvidia Control Panel in Windows. Simply use this Search function your computer and type Nvidia Control Panel using your keyboard.
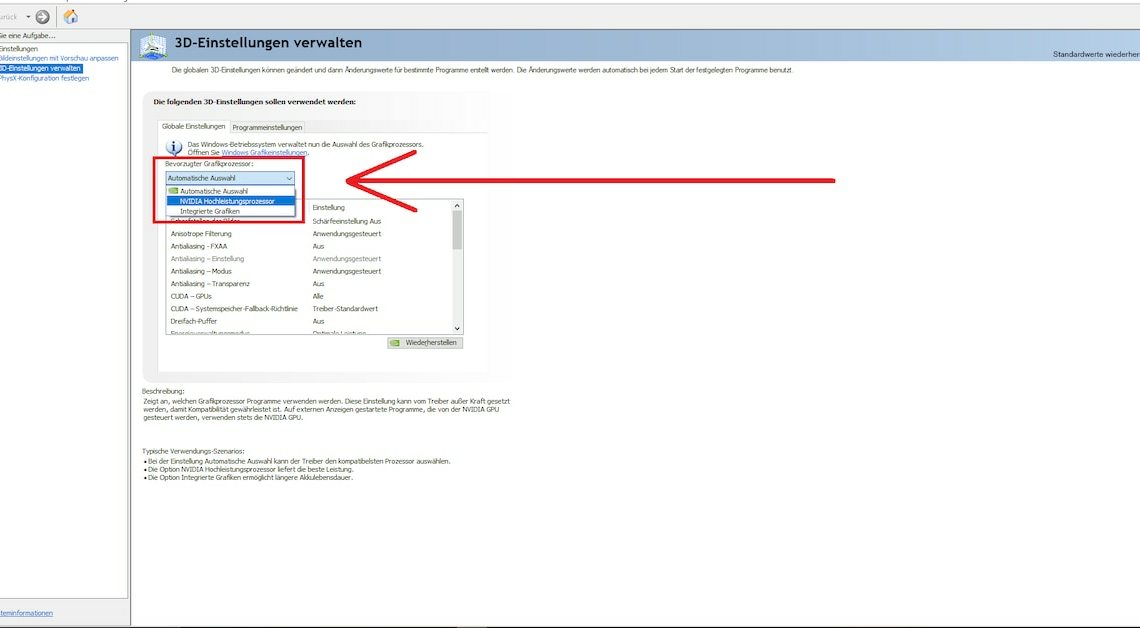
- In the Nvidia Control Panel, navigate to the option Manage 3D settings. There you will get an overview of the currently primarily used GPU Preferred graphics process.
- Usually there is either the onboard graphics card (integrated graphics) or the Automatic selection activated. The program itself decides which GPU is used for the respective application.
- To activate your Nvidia graphics card, click in the field and select NVIDIA high performance processor in the Global Settings. This means you primarily use the Nvidia GPU.
- Alternatively, click on the tab Program settings. There you can select individual applications and run them with the NVIDIA high-performance processor.
- Notice: Also check whether you have installed the latest driver for your Geforce graphics card. This is, for example, about the Device Manager or GeForce Experience possible.
Activate GeForce graphics card in the BIOS: instructions
If your operating system does not access the graphics card at all, you have to restart your computer and that Open bios.
- To do this, press the corresponding button during the boot process. This varies depending on the manufacturer, but in most cases it is (F2), (F5) or (F12).
- Find your settings in the bios System graphics. The instructions for your mainboard or notebook will help you here.
- Activate your GeForce graphics card. This usually happens by choosing the right one PCI or PCI-E connector.
- Save the settings and exit the bios. You can then follow the steps in the first paragraph again.