If you want to rotate an image in OpenOffice Writer, it won't work without a lot of work. However, it is still possible with a few additional steps.
Rotate image in OpenOffice Writer
You cannot rotate the image in OpenOffice, this is only possible in the OpenOffice application “Draw”. Later you insert the image from “Draw” into “Writer”.
- Open “Draw” and click on the tab “Insert -> Picture -> “From File…”.
- Select the desired image and confirm the selection with “OK”.
- Alternatively, copy the already inserted image from the document in OpenOffice Writer using (CTRL) + (C) and paste it back into Draw using (CTRL) + (V).
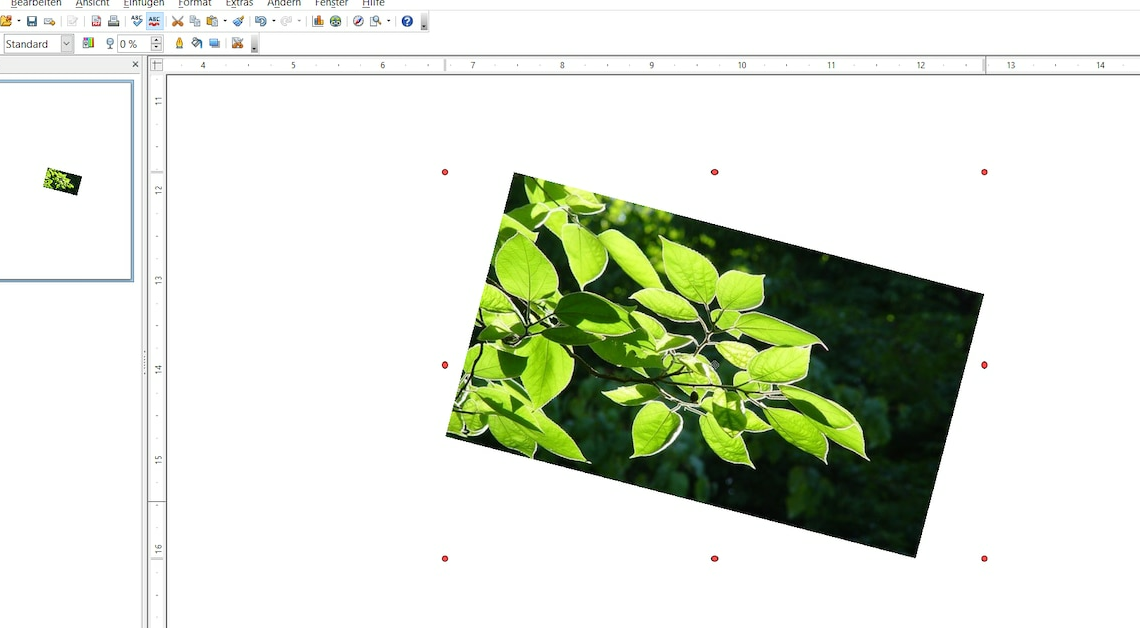
- Click on the inserted image with the left mouse button so that green squares appear on the edge of the image.
- Click on one of these squares to start the image editing mode. You will now see red circles at the corners of the image.
- To rotate the image, hold down the left mouse button and rotate the image at a red corner to the desired position.
- Right-click the image and select “Copy” from the context menu.
- Switch to OpenOffice Writer and insert the image by right-clicking and selecting “Paste”. You can also use the keyboard shortcuts mentioned above here.
- By the way, you also have to go through OpenOffice Draw if you want to rotate an image in OpenOffice Calc.
Rotate image in OpenOffice Impress
In OpenOffice Impress you can rotate an image directly.
- The procedure is the same as when rotating an image in Calc.
- Insert the desired image and select it so that the green squares are visible.
- If you click on one of these squares, red dots appear again and the editing mode is active.
- Click on one of these red dots and rotate the image to the desired position while holding down the mouse button. To exit editing mode, click on the image again. The green squares should now be visible again.
Rotate 90 degrees with photo app
If you just want to rotate an image by 90 degrees, you can do this quickly and easily using the Windows Photo app:
- In Explorer, right-click on the image file: “Open with -> “Photos”. Then select “Edit and create -> Edit”.
- Click on “Rotate” to rotate the image 90 degrees to the right. Save the changes.
- To insert the image in “Writer”, click on the “Insert” tab in OpenOffice -> “Image”.
- Now click “From File…” and select the previously rotated image. Press “OK” to insert the image.
Also interesting:
- Open Office: Cropping an image – how to do it
- Activate guidelines in OpenOffice – here's how
- OpenOffice Draw: Writing in circles