Creating an attractive Outlook signature is easy and increases the professionalism of your emails. It only takes a few clicks.
Create an Outlook signature: A step-by-step guide
Outlook offers an easy way to create and manage email signatures. A well-designed signature makes emails look more professional and saves time because the recipient automatically receives all important information, such as contact details.
- Open Outlook and navigate to Settings: First you have to start Outlook and open the email window. Then go to “File” in the menu bar at the top and click on “Options”. A new window will then open with various setting options.
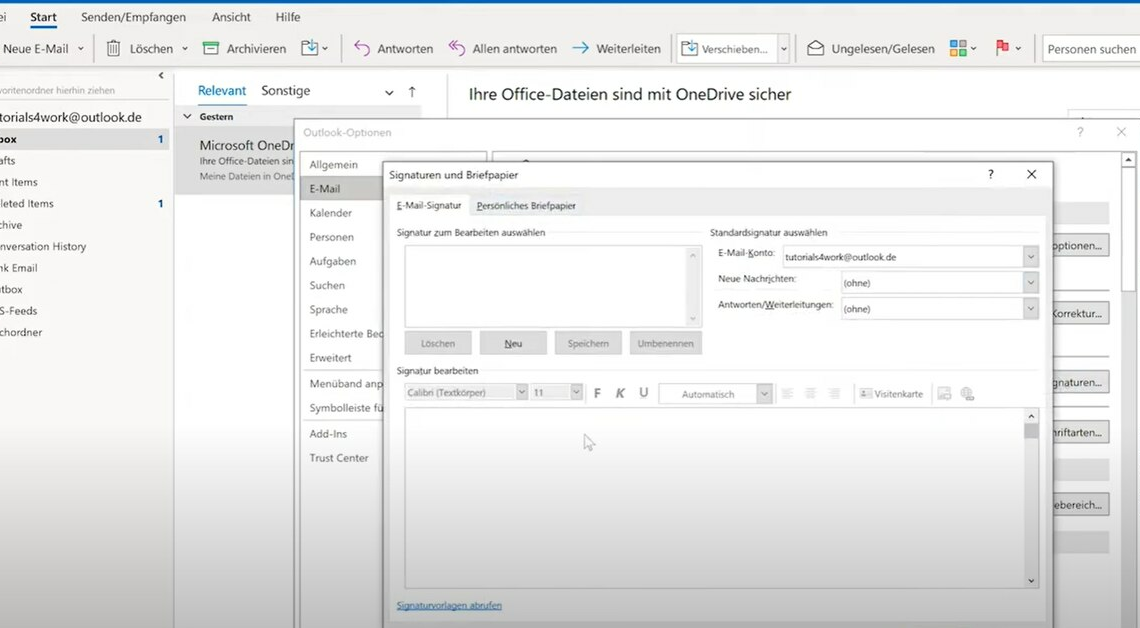
- Access to signature settings: In the “Options” click on the “Email” tab on the left side. Scroll down until you find the “Signatures” section and click on the “Signatures…” button. This will open a new window where you can manage signatures and create new ones.
- Add new signature: In the new window you will see an overview of all the signatures you have already created. To add a new one, click on “New”. You will be asked to give your signature a name so that you can find and manage it more easily later.
- Create signature content: After assigning a name, you can enter the content of your signature in the text field below.
- Typical contents of an email signature are: your name, your position in the company, contact details such as telephone number, email address and website; optional: company logo, legal notices or social media links.
- Outlook offers you basic formatting options such as font, size, color and the ability to insert images. Make sure your signature doesn't look too cluttered – a clear and well-structured presentation is more professional.
Automatically insert and manage signature
Before you can use your signature in Outlook, it is important to know how to optimally manage it and have it automatically inserted into your emails.
- Insert signature automatically: In the same window where you created the signature, you will find the option “Select default signature”. Here you can specify which signature should be inserted by default in new emails and in replies or forwards. Select the desired signature from the drop-down menu. If you do not want automatic insertion, leave the option blank.
- Manage multiple signatures: If you need multiple signatures, for example a more formal signature for business emails and a simpler one for personal communication, you can also create these under “Signatures”. You can then switch between signatures as needed. When writing a new email, you can select the desired signature from the message window by clicking on “Signature” in the menu bar and selecting the appropriate signature from the list.
- Edit or delete signatures: If your contact details change or you want to change the look of your signature, you can easily edit your signatures. To do this, open the “Signatures…” settings again, select the desired signature from the list and edit the text or formatting. To delete a signature, select it and click “Delete”.
- Using the signature on multiple devices: If you use Outlook on different devices (for example, on your computer and on your smartphone), you should make sure that the signature is set up the same on all devices. In the Outlook app for mobile devices, you have to set up the signature separately, as it is not automatically adopted by the desktop version.
