If a program crashes, Windows 10 opens a window in which you can describe the problem. However, the feedback function can also be deactivated.
Windows 10: Disable feedback function for problems
To deactivate the feedback function, simply switch the correct option in the Windows 10 settings:
- To do this, click on the Windows logo at the bottom left and go to “Settings”.
- Here you select the option “Data protection”.
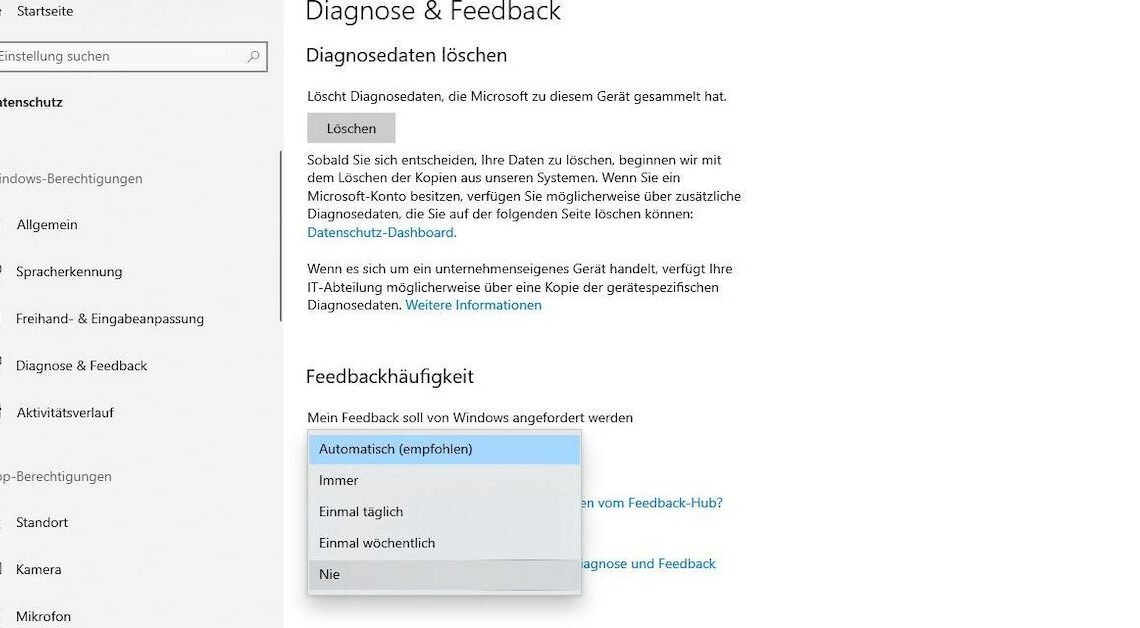
- In the left bar, scroll down with the mouse to the point “Diagnosis and Feedback”.
- Further down under “Feedback frequency,” set the drop-down menu to “Never.”
- Under “Diagnostic and usage data” set to “Simple”.
- Feedback pop-ups will no longer appear on your screen – however, the required data will still be sent to Microsoft.
This is what lies behind the feedback function of Windows 10
With its Diagnostics and Feedback feature, Windows 10 collects important information that helps Microsoft identify problems and improve the operating system. As a user, however, you have the choice of how much data you share.
- Microsoft distinguishes between the categories of required data and optional data.
- According to the developer, the required data includes information about the device used, its settings and functions, as well as its proper functioning.
- The optional diagnostic data includes many individual characteristics, such as the websites you visit and the storage status of your device.
- If the feedback window appears after a program crash, you can choose whether you want to send additional diagnostic data to Microsoft.
Do not send feedback data from Windows 10
In principle, you can also prevent the sending of required diagnostic data, at least if you are using the Enterprise version of the operating system. To do this, however, you must intervene in the registry of your system.
- Open the registry on your Windows 10 device.
- Then navigate to the directory “HKEY_LOCAL_MACHINESOFTWARE\Policies\Microsoft\Windows\DataCollection”.
- Once here, right-click in the right window to create a new “DWORD value”.
- Name this DWORD value “AllowTelemetry” (without quotes).
- Then right-click the DWORD value and click “Modify” in the context menu.
- If the value here is not yet “0”, set it to “0”.
- Then click on the “Windows” logo at the bottom left and select the “Explorer” option with a right click.
- In the context menu, select “Manage”.
- A new window will now open. Here, go to “Services and Applications” and then to “Services”.
- In the list on the right, locate the Diagnostics Tracing Service and dmwappushsvc services.
- Right-click on each service and disable it via “Properties” > “Startup type” > “Disabled”.