A Word outline brings structure to very long documents. It not only helps the reader, but also supports you in creating convincing texts.
How to create a Word outline for a new document
There are only three steps required to create an outline in Word. After opening a new document, switch to outline view, enter the chapter names and format them. Then you can start entering text.
- Open a new Word document. Then select the menu Opinion out of.
- The first block of the menu shows various Views. Select the point outline. You are now in outline view.
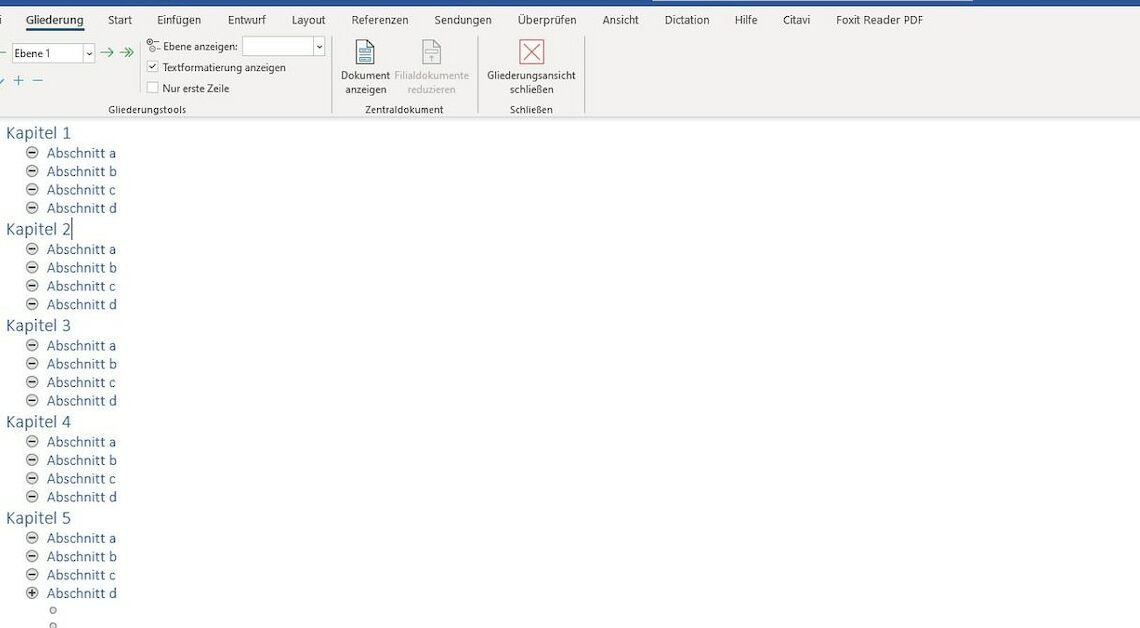
- Enter the first heading, e.g. Chapter 1. End the line with the Return-Taste.
- To enter a subchapter, press the button Tab. Write the text for your chapter section, e.g. section a. End the line with the Return-button. Record all subsections of Chapter 1.
- Now insert Chapter 2. To do this, open the menu on the far left from the area Outline tools the Dropdown menu and select Level 1. Alternatively, you can use the left arrow key to move the new line up one level. Use the right arrow key to move the line where your cursor is located down one level.
- When you have completed the outline, click the red cross in the menu bar Close outline view. You are back in the menu Start and now see your outline. If you want to change the design of your headings, first select the entire row and then select from the section Styles Select a new design from the drop-down list.
- To fill the outline with text, place the cursor at the end of the heading line and press the Return. Now you can write the text of the chapter.
Adding an outline to a Word document
Of course, you can also subsequently structure a document that has already been created. To do this, insert headings into the existing document and bring them to the desired structure level. You should first consider which structure and how many levels make sense for your document.
- Open the document you want to structure and select the Opinion-Menu the selection outlineYou will now see the complete text with the respective formatting.
- Click on different parts of the text and look at the dropdown list. The entire text is currently Body text marked.
- To convert headings into bullet points, first select the desired line. To do this, simply place the cursor anywhere in the line. Then select Dropdown-Menu in section Outline tools the desired level.
- Word already sees nine levels that you can use to structure your document. However, please note that the more outline levels you add, the more text you will have to write. Three levels are usually enough to give structure to a long text.
- To edit your text using the outline tools, always first place the cursor in the line you want to edit. Then assign the line a new level via Dropdown-List or Arrow keys to the left and right.
- The Doppelpfeil to the left resets the section to level 1, while the double arrow to the right formats the entire text as body text again.
- Using the outline tools, you can now move outlined text up or down in the text. You can also reduce the amount of text (–) to be displayed or expand (+) to edit the text content.
The following articles might also interest you:
- Formatting a Word table of contents: How to do it in 2024
- Word: How to insert an automatic table of contents
- Word: Create index