You can create PDF files in OpenOffice with one click. It is also possible to customize the PDF in advance.
Create PDF in OpenOffice: Instructions
Do you simply want to create a PDF document from an OpenOffice document To create a profile, proceed as follows:
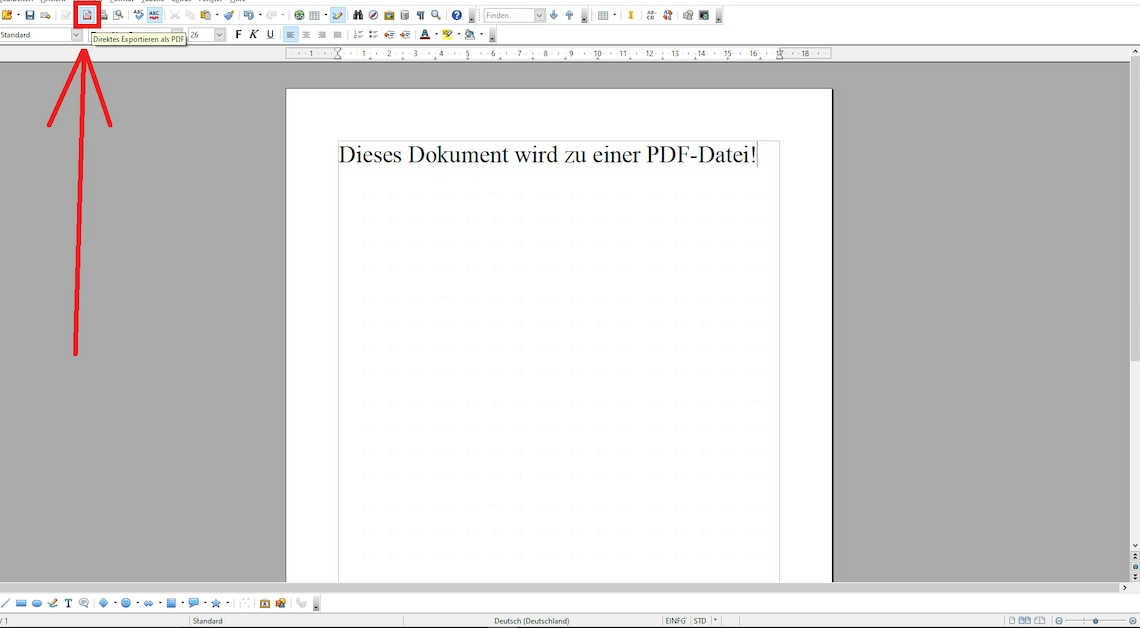
- Open the relevant OpenOffice project. Then click on the icon in the menu bar at the top. Direct export as PDFlocated next to the print icon.
- Then select the destination folder and a file name. Then click Save.
- The OpenOffice file is now saved as PDF exported. It will then be available for you to use.
- Notice: It makes no difference whether you use OpenOffice for Windows or macOS. PDF creation works the same on both operating systems.
Create PDF in OpenOffice: Use additional settings
Do you want some more additional settings or Comments from your file in OpenOffice to the PDF, this is also possible.
- To do so, simply click on file and in the context menu click Export as PDF…A window with further settings opens.
- These include, for example, reducing the size of images or including comments in the PDF file. Make sure that the option Create PDF form is activated.
- Then click on Export. Select the destination folder and a file name and click Save.
Create PDF with OpenOffice: Other methods
There is still the possibility of a PDF-Printer like installing the Bullzip PDF Printer. You can simply select this from the Print menu and the software will then create a PDF document for you.
- This also works with older Office versionsbecause your computer recognizes the PDF printer as a printer.
- Alternatively, use PDF Creator software or Online-Converter. Simply upload the OpenOffice file or import it into the program and it will be converted into a PDF.